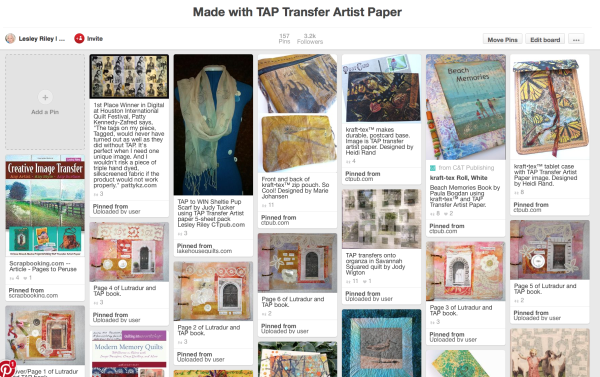
Check out my Pinterest Made with TAP board for other examples, info and ideas.

Washing TAP Transfers
Always pre-wash the fabric prior to creating any transfers that will be washed later on. The sealed transfer area will not shrink in a dryer. Do not use fabric softeners or dryer sheets prior to transferring – after is fine.
Be sure to iron the TAP paper thoroughly so that there is no polymer remaining. A full two-minutes is recommended for optimum laundering results and easier paper release. This full transferring of the polymer will ensure that the inks are fused into the fabric. Test results demonstrate better color retention after washing if the paper is peeled hot after 2-minute ironing.
Wash on a gentle, cold cycle by itself to avoid any abrasion from other items. Tumble dry low or delicate – air drying is good too.
Initially after transferring, wait at least 24 hours to wash, 48 is best, to ensure that the polymer has fully cured.
Remember, washing does effect fabric, by softening it and causing color loss over time. But the polymer encased inks should remain bright for the long-run.
FAQ
I have been told that your transfer paper is the best, but I’m new to this so I’m not sure which paper I should purchase. I have some vintage images from the Graphic Fairy and want to transfer some of the designs on to a tight weave burlap or osnaburg. The Graphics Fairy says to use your product but there is so much to chose from I wasn’t sure which was the best choice. Does just the image show up on the pillow when you iron it on, or does the design have to be cut out, or is there a “square” of paper around the design?
TAP is the preferred transfer paper for permanent, colorfast transfers. It fuses into the fabric and seals the inks so there is no fading. Yes, all you need to do is print in reverse and iron it onto your fabric or other surface. Always peel hot for the easiest release.
You can cut the design out but it it not necessary. All white areas transfer as clear. Clear areas still transfer a polymer which disappears on white but creates a darker “wet” looking effect the further away you get from transferring onto a true white. You’ll find that holds true for all transfer papers & techniques unless you trim.
I bought TAP for a glass transfer project but it did not work half of the image did not iron on. I used the highest iron setting no steam. Any suggestions?
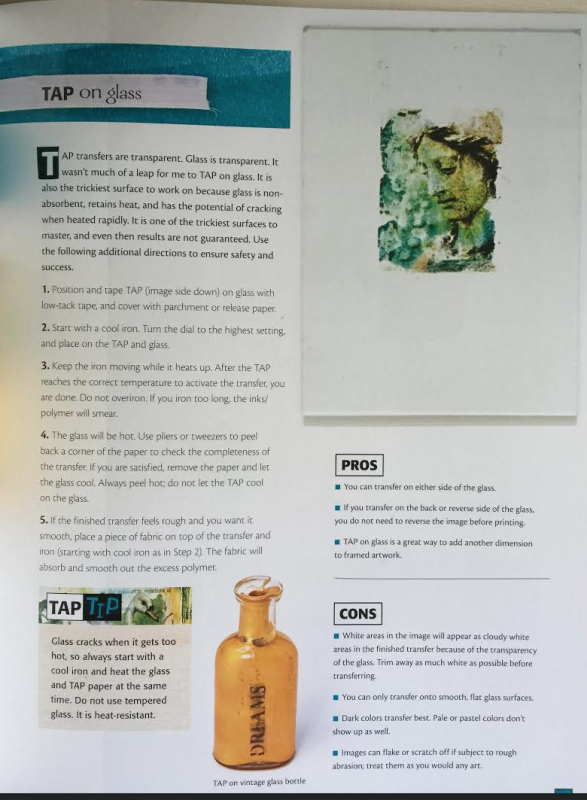
Glass is the hardest and most advanced surface to transfer too. I always suggest getting familiar with how it works before attempting to transfer onto glass. There are several videos that you can access on my website that give you basic information – https://lesleyriley.com/learn/ as well as many on YouTube.
Transferring to glass is quite tricky but it can be done. It’s a TAP Master level process. Results are not guaranteed. It also depends on the glass. You need to work on flat glass so that the iron comes in full contact with the image + glass. You need tempered glass so that it does not crack when heated. Start with a cool iron and let it heat up on the glass so that the glass gradually heats up too. Keep it in continuous movement over the image that you have taped (blue painters tape) onto the glass. Once it reaches the point of melting the polymer on the paper it will transfer and you are done. Over-ironing will smear the image. Peel hot but slowly – tweezers will help you pick up the edge of the paper from the hot glass. Let the glass cool completely before handling.

Obvious some familiarity with transferring TAP onto other surfaces is recommend so that you are well acquainted with how the product works on a variety of surfaces, including non or less absorbent ones like wood, mica and craft metal.
All info is fully explained on page 23 of my book, Create With Transfer Artist Paper. I have included the page in my book, Create with Transfer Artist Paper that discusses TAP on Glass. Understand that it takes practice and even then, results are unpredictable. And, remember, the glass must be flat so that the iron comes into complete contact with the paper and the glass.
I have a question for you. I do photo transfers, usually laser printed applied with gel medium on mixed media background. I have trouble getting all the paper removed and am looking for an alternative method. I use wood frames covered in found paper, acrylic paint and ink for the background. I then put a photo transfer on top. Would your paper work for this method? I usually put a coating of gel medium on top of the painted paper before doing the transfer. If your method works on the wood and paper would it be better to seal after the transfer process?
TAP paper would work well on the original papers, but not on the gel medium coated papers. It needs a surface that will absorb the polymer that melts while ironing the transfer onto the paper. The gel medium would prevent that, making the inks of the transfer slip and blur. So yes, best to seal AFTER the transfer is done.
I have already purchased your TAP paper. I transferred on a felt surface and it worked really good. I’m planning on making an object for my baby with the felt. I wondered if this product could be toxic since babies often put things into their mouth. Do you think the ink can be swallowed and that the transferred picture could be toxic for my baby ? Or does the TAP paper has a layer preventing the ink from getting out ?
Thanks for being a TAP user. I love how it looks and feels on felt. The good news is that TAP is non-toxic. It seals and fuses the inks into the fabric. The mfg once told me that you could eat the TAP paper, but who would want to? So create with a clear mind. I know your baby will love it for years to come.
Can the TAP sheets be used with a heat press? If so, at what temperature and how much pressure?
Yes! It can be used with a heat press.
- Print in reverse
- Temperature: 375 F
- Press fabric for 3-5 seconds to release moisture and remove wrinkles
- Place printed side down onto garment/fabric
- Set to 40-60 PSI or use firm pressure
- Time: 25 seconds
- Pressure: Heavy/Firm
- Hot Peel
As I have read it can be used with an inkjet printer….So…is it better to use dye ink or pigmented ink in the printer in order for the transfer to not bleed and last longer on fabrics? I will be using all cotton.
Yes. TAP is only for inkjet printers. I have always used pigment ink in my Epson, but it is formulated to work equally well with both pigment and dye inks and all inkjet printers.
Have you used TAP on leather with success?
Yes. The thinner leathers work really well, chamois, suede, calf, kid and the leather pieces sold in the craft stores. It will depend on how the leather is finished, too, so I recommend testing on hides or other lager pieces before jumping in.
I just purchased a pack of TAP and while falling asleep I realized I don’t even know if I can use it on my store bought primed ready-to-use canvases. Is it possible? Or will heat do something weird to gesso and ink?
Yes, you can use TAP on a gessoed canvas but there are some things to know beforehand. To get a good transfer you need to work on a firm flat surface. The stretcher bars can cause some incomplete areas. Also, the center area of the canvas is not firm, so you need to place something like a book inside of the back of the canvas to support it. Also, since the canvas is gessoed, the ink and polymer on the paper is not as readily absorbed and you should take care not to move the iron to much so that you don’t get smears. A light sanding will help polymer absorption. Also, it will not take as long to transfer. My advice is to practice on fabric, then paper, then a small or practice canvas or canvas panel. If perfection is not your goal and you are using the transfer as a guide for your painting, then no worries, but if you want perfection, it will take practice.
Can you use the TAP paper on spray painted wood?
TAP can be used on spray painted wood but there are a few things to consider.
Has the paint cured? If you are using acrylic paint, freshly painted wood will melt and bubble if heated. Allow paint to cure for a week or so.
Also, when the wood surface is sealed with paint, the polymer cannot be absorbed so may smear when ironing. Practice is recommended until you get a feel for how long to iron and how much movement of the iron to use. Black smears the most.
I always tape the printed TAP paper with blue painters tape along one edge so that the paper doesn’t move during transfer, but is easy to remove afterwards.
I recommend getting some unfinished wood panels at the craft store to practice on first. You can also paint/stain the wood with acrylic ink. That results in a more absorbent surface making for easier transfers. Let the ink/wood dry thoroughly before transferring. I have also transferred images to wood and then painted around them. The polymer on the paper will seal the wood meaning that nothing applied after the transfer will be absorbed into the wood. Also, be aware that the cheaper craft wood panels are not always smooth and any irregularities in the grain will effect the final transfer. Try sanding if you encounter this. And you can always sand over the transfer and try again on the same piece.
Don’t see the answer you’re looking for? Shoot me an email.


